Health app is one of the most exciting features of iOS. Health app
allows other apps to share its data. It may be used to track all sort of
information like your fitness and exercise, blood pressure, quality of
sleep and much more. A medical ID is one of the most subtle but most
important features of a health app. Users may get to know about
pharmaceutical, pertinent medical, personal information, etc.
How to Get an iPhone Medical ID in Health App
In conditions when you need a Medical ID, then users can be already in some of the trouble. Set it up now. Users need to have an iOS device that is running iOS8 or higher than that. Set up your medical iD by Opening the health app. Tap the health app to open it. Now click “Medical ID” in the bottom right-hand edge of the application. Click “Create Medical ID” and keep going.Fill Out the Information for the “Medical ID”
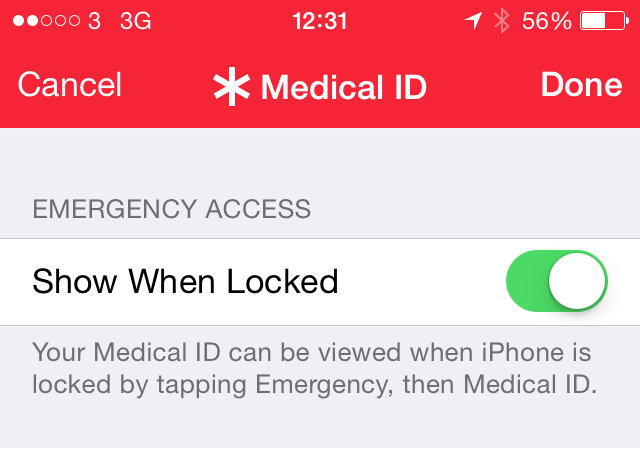
A medical ID is a screen that is full of valuable information regarding “health and emergency contact” info. You will see options such as:- Show When Locked– It will control if the Medical ID could be viewed from the lock screen of iPhone or not. This option will be needed for emergency responders for accessing the information; it will happen only if the iPhone is secured with Touch ID, FaceID or a passcode. One con associated with this is that anyone with physical access to iPhone may see the Medical ID. Just choose if you are comfortable or move the slider to On/Off.
- Name and Photo– They will be “pre-populated” by the info that is stored already on iPhone. Click your name and make changes to it. Now click the Edit button for changing the displayed picture.
- Date of Birth– Add the Birthdays here.
- Medical Conditions– Click this section and write if you are facing some therapeutic status that is appropriate.
- Medical Notes– It is also similar to Medical Conditions. But usually, it is taken up for another valuable medicinal data.
- Sensitivities and reactions– Got allergies or some reactions to food and medication, write about them in this section.
- Medications– If you take medications then record them here so that the answerers are informed of the data when you are unable to tell them anything.
- Blood Type– When you are aware of the blood type, click this option and choose from a list of blood types.
- Organ Donor– If you have to indicate the status of organ, then click this option for saying Yes or No.
- Weight– Click this and choose the weight.
- Height– Click this and choose the height.
- Add Emergency Contact– It incorporates information of contact for the people who you need to be notified in an emergency. Keep in mind that if the Medical ID can be viewed out of the lock screen. To add the emergency contacts-
- Click Add Emergency Contact
- It will bring up the address book.
- Search for the person that you need to add and click their name. Users can choose contacts whose phone numbers are there on the phone. Select the best one if there is more than one number.
- Now choose from the list for explaining their connection with you.
- Now you can add emergency contacts.
Viewing an iPhone Medical ID in Emergency
- It is straightforward to access Medical ID in an emergency:
- Tap the iPhone’s Home Button for waking it up.
- Access the passcode screen.
- At the bottom left, click emergency.
- Click Medical ID again.
- Click Done when you are done with reviewing the information.
Marshall Lyne is a self-professed security expert; he has been making the people aware of the security threats. His passion is to write about Cybersecurity, cryptography, malware, social engineering, internet and new media. He writes for Norton security products at norton.com/setup | mcafee.com/activate | office.com/setup | norton.com/setup |office.com/setup | office.com/setup
Comments
Post a Comment